
Good foam and frothing can transform your latte experience. Learning how to froth milk is fairly easy and transforms the coffee experience at home. And I have to say, it is some fun watching milk froth.
A job well done leads to a rich mouthfeel and a great experience. Let’s consider an example. You’ve been using gourmet coffee beans and still find your homemade latte isn’t a match to a store-bought latte. The foam could be your problem. It governs texture and mouthfeel and very much affects how we taste the drink.
It’s also the key to all that cool latte art. I’ll admit I’ve never been able to make any remotely cool latte art. But hey, one of these days, I just might find a way!
Characteristics Of Frothing Done Right
These are the things you want out of the frothed milk for best results. It’s not enough to make foam and froth it, the key is frothing milk right.
- Microfoam is formed of tiny bubbles you can barely see. This is the most desirable set up and will give the best results. Consistency is as important. If you see a lot of larger bubbles in the mix, something didn’t go right.
- Texture and mouthfeel of the right frothing will be rich and velvety. It is smooth and pretty much defines your impressions of the latte and its taste.
- Ease of use is an important aspect of any milk frother. Only a small amount of time should be spent on frothing milk. Being easy to use and clean are hallmarks of a quality frother.
Tips For Frothing Milk

Here are a couple of ways that can be used for better results.
- The temperature of the milk should be warm, or rather, hot. Ideally, you want milk between 140 and 155 degrees Fahrenheit. Automatic frothers generally warm the milk themselves. However, if you’re using a manual frother, keep an eye on the temperature.
- Grooming foam for better results is okay. A gentle tap on the container to pop large bubbles is acceptable. Grooming is for taking out the random oddity, not for bursting every random bubble that shows up.
- Don’t overdo it. It is rarely a problem, but spending more time than necessary can start churning the milk fat into butter. If you’re a beginner, don’t assume that spending extra time trying to froth milk will bring better results.
Frothing Milk Alternatives Like Almond Milk
Almond milk is the most popular milk alternative. Thankfully, it is also convenient to froth, much like regular milk. The temperature requirements remain the same. You may have to put in a few seconds of extra work to get the froth going.
Coconut milk and soy milk can be a bit trickier. In these cases, it’s best to use a handheld milk frother over other options.
Popular Frothing Methods And Appliances
Here are the popular frothing methods and appliances I’m going to discuss in this article. To be clear, there are several recipes and methods available. And people swear by the effectiveness of many of these. For the sake of use and conciseness, I’m only including the most popular methods available.
- Automatic frother
- Frothing wand
- Steam wand
- Frothing with a French Press
- Using a blender
- Using an immersion blender
- Shaking a jar
- Whisking by hand
- Pump frother
- Pulling Method
Using An Automatic Frother
The joy of using an automatic frother is the simplicity and the higher likeliness of getting microfoam. In most cases, all you have to do is add milk, and the frother will heat and foam the milk by itself. Many automatic frothers also allow choosing between cold and hot foam.
There is practically no manual work required. All you have to do is pour milk and select your desired settings.
My Pick – Souvia Automatic Milk Frother and Steamer
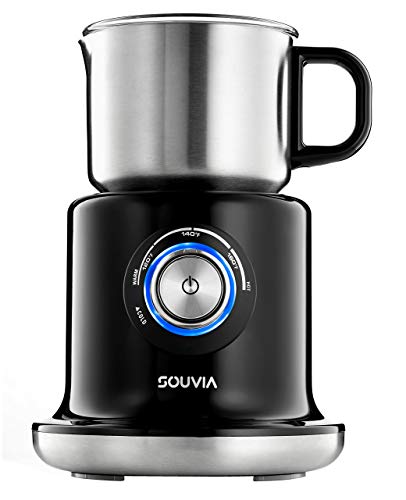
In terms of pricing, the Souvia Automatic Milk Frother and Steamer falls well into the reasonable category. I won’t call it cheap, but it is cost-efficient as far as automatic milk frothers are concerned.
A 700ml milk carafe sits over the machine. That’s a generous volume and can easily handle most household milk frothing needs. The automatic machine includes options for temperature control and allows some customization of the foam.
Souvia milk frother includes two disks. The cappuccino disk claims thick and creamy froth, while the latte disk boasts of keeping things smooth. Both these options are easy to use and result in exceptional foam. The milk jug/carafe is stainless steel and dishwasher safe. This allows for easier use and cleaning.
A Frothing Wand
As far as dedicated milk frothing options go, a frothing wand is tough to beat. These are lightweight, take very little space, and are affordably priced. Also known as handheld milk frothers, the frothing wands do their job pretty well.
Of course, they won’t heat the milk, so that part’s up to you. Dip the handheld frother into the milk and move it around with slow, deliberate motions.
You will soon see the volume of the milk increasing and the foam forming. As the quality of foam goes, these don’t perform better than automatic frothers. There will be microfoam, but don’t expect it to be uniform. Overall, considering the quality of foam and pricing, these are pretty great tools.
Top Recommendation – PowerLix Milk Frother
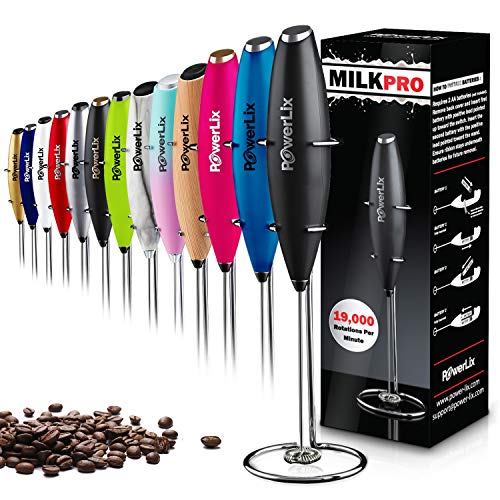
Small, compact, and battery-operated, the PowerLix Milk Frother is a very convenient option. The small-sized milk frother is easily portable, so you can take it along if you so choose.
Power comes from two AA batteries. It’s sufficient for use and operation, but don’t expect it to last long on regular use. Its soft-touch controls are quick to respond for easier use.
The stainless steel whisk claims to be easy to clean. It’s a tall claim because, over time, any coiled frother whisk is going to be a chore to clean. But hey, it’s affordable, and it works!
Steam Wand
If you’ve used an espresso machine, you’ve likely dealt with the steam wand. Essentially, the steam rising from heated water in the machine is collected and pushed through the wand. The force of the releasing steam and its temperature heat the milk while also frothing and foaming it.
The usefulness of the wand depends on the machine and its handling. Some machines do a remarkable job with the steam wand. Others just make a mess. If you have an espresso machine, give it a shot and see how well the steam wand works.
The French Press Method
A french press is the favored method for many coffee drinkers. Well, it works as well for milk frothing! It doesn’t take much effort to froth milk in a french press, and the froth quality is surprisingly amazing. This is likely the best method for how to froth milk without a frother.
I’d go so far as to say that it works better than a handheld milk frother where foam quality is concerned. The downside is the cleanup. The mess takes forever to clean up.
When using a french press for frothing, fill it up to about one-third with milk. Put the lid on and push down the plunger. Make sure you’ve secured the lid right because splattered milk isn’t fun to clean.
Rinse. Repeat. You’ll have to push the plunger a few times, until the milk doubles in volume. Once you see it there, your job is done.
Top Recommendation – Bodum French Press

Picking the Bodum French Press is pretty much a no-brainer. Bodum French Press is one of the more popular coffee makers available on the market right now. Plenty of size and color options are available, so you get to take your pick.
Bodum French Press is fairly easy to clean, as the beaker, filter, and plunger are dishwasher safe. The lid and frame, however, will have to be hand-washed.
Using A Blender
Every home has a blender, so it makes sense to use one when frothing milk. The usage is simple enough, though be sure to secure the lid tight. You’ll also need to be careful about the timing because the electric blender won’t hesitate in pulling butter out of the milk!
Warm up the milk and add it to the blender. Now run it at medium speed for a few seconds. You’ll notice the volume of the milk increasing, as well as the formation of foam. It’s quick and easy. The foam isn’t of the highest quality but it’s a decent option for occasionally frothing milk at home.
Employing An Immersion Blender
Using an immersion blender to froth milk is pretty much the same as employing a frothing wand. The larger difference perhaps is that an immersion blender is slightly bulkier and less efficient than a handheld frother.
Most immersion blenders come with attachments and blades that can be suitable for different purposes. Put on the right attachment before you use it to froth milk.
By its very nature, an immersion blender is always at risk of creating a mess. The milk can easily spill if you’re not careful. To minimize such chances, place the warm milk in a tall container, filling about one-third of the container. Move the blender around slowly, and you will see foam forming and the volume of the milk increasing.
It is unlikely that the blender will double the milk volume, as is usual with more efficient frothers. The foam will not be uniform either and a stable microfoam is very unlikely.
This method is useful in a pinch, but best avoided.
Shaking A Jar
This is a very basic method for frothing milk at home. Don’t expect excellent froth quality from this method but it is acceptable for those who rarely need to froth milk.
Put the warm milk inside the jar, while avoiding to fill more than one-third. Close the lid securely so the milk doesn’t flow out while you shake the jar. Give yourself a minute or so while shaking the jar. It is intensive and can be a fair amount of work.
You’ll notice the volume of the milk has increased and there is substantial foam. There will be very large bubbles in the foam, which is why this method isn’t the best suited.
Whisking By Hand
Froth milk the old fashioned way! Take a whisk to the warm milk. You’ll need to whisk the milk vigorously for about a minute to see the foam forming. The quality of the foam is slightly better than the jar method, but not quite up to the mark.
Pump Frother
A pump frother is a specialized milk frother. In effect, it is better than the frothing wand and way cheaper than an automatic frother. Functionally, it is quite similar in construction and use to a french press. It won’t make coffee like a french press, but it does its frothing duties slightly better.
When using a pump frother, fill up one-third of the frother with milk. Place the lid and securely lock it. You’ll have to pump the handle a few times, perhaps for 15-20 seconds. If the frother has an insulated handle, use it to hold it in place. Otherwise, you can make use of a towel to hold the frother and avoid discomfort due to the hot milk.
Top Recommendation – Norpro Glass Froth Master
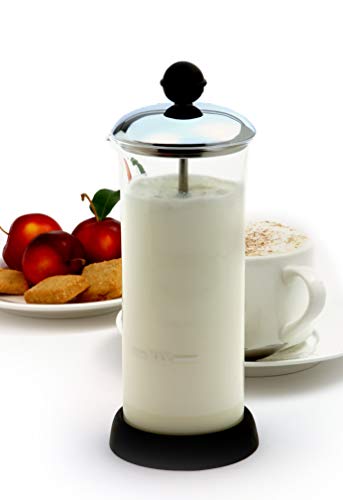
Norpro Glass Froth Master has its main body as a tall cylinder made from glass. The plunger is stainless steel. The combination of these materials works fairly well, and the Norpro is, well, a pro at frothing milk!
The only downside is that the body is made from glass and there is always a risk of it breaking. On the plus side, the foam is phenomenally good. Overall, the Norpro is also great value for money.
Pulling Method
You’ll need two jars or glasses for the pulling method. Essentially, you’ll be pouring milk from one container to the other as a way to froth milk. Greater the height difference with each pour, the more the milk will aerate. Unfortunately, it also means greater chances of creating a mess.
The process will have to be repeated a few times for the milk to aerate and foam to form. Honestly, pouring milk from one container to the other is a bit of fun. However, neither the foam nor the clean up after that is worth all that effort.
Frothing Milk The Right Way
We’ve covered the most popular methods and tips used to froth milk. As you see, learning how to froth milk is convenient and doesn’t require much hard work. You can have stunning foam with a dedicated milk frother at a relatively low price. Those who need frothing only occasionally can give it a shot to try to froth milk without a dedicated frother.