Keurig 2.0 is the advanced version of the famous Keurig coffee maker – a phenomenal and widely loved coffee brewer. Keurig 2.0 gives you more selection and personalization options, however, knowing how to clean a Keurig 2.0 is a different story altogether.
There is nothing like having a freshly brewed cup of coffee to kick start your day. Ever since the advent of home coffee-brewing machines, it is much convenient and cost effective to have coffee in a comfortable home environment.
Having said that, you might have experienced that over the time, the taste of your coffee that you brew using your Keurig 2.0 coffee maker, has gone down. Usually, this is because your coffee maker hasn’t been cleaned for a long time.
In this guide, we will walk you through the steps involved in cleaning your Keurig 2.0 coffee brewer.
Some Interesting Facts about Keurig Coffee Brewers
Owning a Keurig coffee brewer means you don’t have to worry about your coffee regime. Be it morning or evening, you have a one-stop solution to meet your caffeine needs.
Keurig is a staple kitchen appliance of almost every household in the US and around the world because of its practical and time-saving nature.
The most important part is cleaning this phenomenal coffee brewer. There are different methods and we will be talking about each one in detail.
Coffee brewing machines need a thorough cleaning once every six months (at least). All coffee makers need to go through a cleaning process or else they can become a home to bacteria and mold.
Cleaning this machine is not too much of a hassle. In fact, you will find the cleaning process to be extremely easy and time saving. You have to rinse the removable parts regularly, while the machine itself can be cleaned once every six months.
The Right Way to Clean the Keurig Coffee Machine
Due to its smart design and easy disassembly of parts, Keurig coffee maker’s maintenance is relatively quick and easy. The company has introduced a remarkable cleaning solution which makes the process a whole lot easier.
The cleaning solution is easily available at all major online marketplaces.
Cleaning the Water Reservoir
When you get a display screen notification that says “Prime”, it’s a clear indication that the needle is blocked. Descaling methods can be used to clear up the dirt or particles that are causing the obstruction.
Unclogging the water reservoir
- Remove the reservoir.
- Use soap and water or any cleaning solution.
- Rinse and carefully and let it dry.
- Once it’s completely dry, place it back in the machine.
- Similarly wash the water filter too. Use soap and water and let it dry.
Descaling Your Keurig 2.0
Descaling process is an extremely significant part. Limescale is a misfortune for many kitchen appliances. When there is limescale scourge in the machine, your coffee will taste different. Descaling should be done once every two to three months.
If you get hard water in your area, make sure you descale your coffee maker more often as hard water contains limescale. Keurig machines notify you with an automatic cleaning reminder, so that’s a plus.
If your Keurig model does not have the automatic message feature, note it down on the calendar or you can always put a reminder on your smartphone.
How to Descale a Keurig
Descaling is a vital process to clean a coffee maker. There are various methods to descale a Keurig 2.0 coffee brewer, such as:
- Descaling Solution
- White Vinegar
- Citric Acid
We will discuss each of these methods below, however, regardless of which descaling method you opt for, you will first need to:
- Remove the mug holder and the K-cups from the machine.
- Remove the drip tray if your machine has it.
- After this take off the water reservoir and the lid.
- Shut off all the automatic features as the machine will be on while the descaling process.
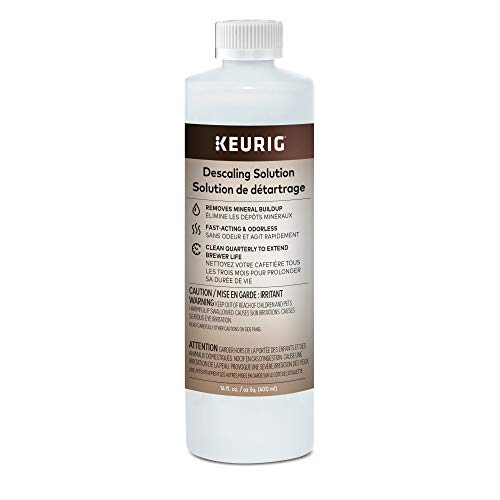
Descaling Your Keurig Brewer Using Recommended Keurig Solution
The recommended descaling solution for Keurig coffee brewers is the Keurig Descaling Solution Brewer Cleaner. This can be used for all Keurig models. You can order it online on Amazon or get it from the nearest grocery store.
- You have to fill the reservoir with water and the solution, keeping the ratio 1:1.
- Place your mug under the dispenser, brew one cup of hot water and pour in the mug. Push the handle upwards, wait for 5 seconds and then release it. After pressing brew, once the cup is fully filled, empty it completely.
- Repeat the same step until the water is finished. When you see the ‘add water’ notification, give it 30 minutes. Keep the machine turned on during this step.
- The cleaning solution will be doing its magic during this time.
- After this make sure you wash the reservoir carefully as no solution should be left inside. Refill cool water and thoroughly clean the machine using this water.
- Now, repeat the brew process using only clean water in the reservoir just to make sure it’s clean and no solution is left.
- You can now brew your cup of Joe in the descaled Keurig machine.
Keurig Descaling with Vinegar
Vinegar can be a good home remedy that works really well for descaling. The acid in vinegar helps clean the limescale thoroughly.
- Empty the reservoir and take off the pods.
- Take off all the removable parts of the coffee brewer and wash them.
- Wipe the remaining residue with a clean damp cloth and set up all components back together.
- Now turn on the machine and fill the reservoir halfway with the vinegar and the rest with water. Brew it and then place a mug on the tray. Keep repeating this cycle until the reservoir is empty.
- Now repeat the same process using clean water only. This will make sure that no traces of vinegar are left inside and the machine is squeaky clean.
- Your Keurig machine is ready to use.
Heinz White Vinegar is a good product that you can use for descaling your Keurig machine.
Descaling with Citric Acid
Citric acid (or sour soda) is another effective home remedy to clean your Keurig 2.0 coffee brewer. For this, you have to:
- Take 2 tablespoons of citric acid and dissolve into one liter of water.
- Add this mixture in the reservoir and let it rest for a while. Traces or limescale build up inside will be descaled during this period.
- Place the mug and brew a single cup. Discard the mixture until the mug is empty.
- Keep repeating the previous step unless you observe that the brewer is thoroughly cleaned.
- The next step is to add cool water in the reservoir and brew a couple of times.
- Once you are done with cool water, add hot water and brew it a couple of times.
- Keep repeating the process until the machine is clean. Always remember even if a tad bit of solution is left in the machine, it will affect the taste of your coffee.
- In case you feel your coffee tastes different, repeat the brewing process with clean water.
Summary of Descaling Methods
Out of all the descaling methods mentioned above, you can choose whichever method suits you the best. Home remedies are a good alternative but it is best to use the Keurig descaling solution, as it is specifically designed to clean and descale the machine.
Cleaning the Keurig Device Needle
The needle is a sensitive component of the machine and requires your utmost care and focus while cleaning it. For optimum performance, your Keurig 2.0 needle requires cleaning as well and to make it easier for you, Keurig offers its own needle cleaning equipment.
Cleaning Your Keurig Needle
- Unplug the coffee machine and remove the reservoir.
- Press the side buttons to remove the machine’s pack holder.
- With the help of paperclip, clean any residue that is stuck on the machine’s needles and rinse it. (as mentioned above, proceed with care as the needle is a very sensitive part of the coffee maker.)
- Your coffee maker is ready for use.
What about the Entrance and Exit Needles
The top exit and entrance needles are crucial to clean. You have to be very careful while cleaning this part. This is how you can do this:
- Remove the coffee maker from the socket.
- There is a top exit needle and an entrance needle that can be accessed after removing the pack holder.
- Clean both the needles with a paper clip carefully as the needles are quite sharp.
- After this put the pack holder in the coffee maker.
- Once you are done, add water in the reservoir and run a brew cycle.
- Keep repeating the process until the machine is completely clean.
Cleaning the Diffuser
Diffuser is quite easy to clean. You simply have to turn off the coffee maker, unplug it and remove the diffuser from the machine. Wash it with fresh water and clean with cloth.
Attach the diffuser back and you are good to go.
How to Clean Your Keurig K-Cup Holder
K-cup holder requires a clean-up as well. Although you do not need to do it very often, it is important to clean the K-cup holder once in a while.
Follow the instructions given below to clean the k-cups:
- Unplug the coffee brewer from the socket.
- Lift the handle and remove the machine’s k-cup holder.
- Use warm water and soap to wash it.
- Rinse well and let it dry.
- Assemble the holder into the machine.
- The K-cup holder is clean.
How to Clean the Exterior of Keurig 2.0
The exterior of the machine is equally important to clean as it is exposed to dust all the time.
Here are basic steps to clean the exterior of your Keurig coffee maker:
- Remove the device from the socket.
- Take off the drip tray and the reservoir.
- Using a damp cloth wipe the coffee machine.
- Use a dry cloth to clean it again.
- Your coffee machine is good to go.
What about the Lid, Tray and Funnel?
You just have to wash the machine’s lid, funnel and tray with soap and warm water. Dry all the parts and place them back on the machine.
When to Clean Keurig Coffee Maker Components?
Keurig 2.0 has a number of parts, some are detachable and some are not. The key is to know when to clean each part.
Here is a time frame to clean your Keurig 2.0 parts:
Once a Week
All detachable parts of your Keurig 2.0 coffee maker should be cleaned once every week.
Once a Month
Change the water filter cartridge every month. Follow these simple steps to change the cartridge:
- Dip a new cartridge in water and then rinse it for 60 seconds.
- Wash the filter mesh and insert the cartridge in the upper holder.
- Put the lid back on and place it into the water reservoir.
- Don’t forget to lock it once you place the cartridge back.
- Your Keurig cartridge is replaced and all set.
3-to-6 Month Basis
Descaling needs to be done after every three to six months. Limescale, bacteria and other particles clog the Keurig machine, therefore descaling is crucial to perform within this time frame.
Our Final Word on Cleaning a Keurig 2.0 Coffee Maker
Keurig 2.0 coffee maker is an amazing addition to your household. It is a coffee lovers’ best friend as it is time saving and user-friendly. However, if you do not know how to clean a Keurig, you might not get the best results out of it.
Cleaning a Keurig 2.0 is also extremely easy and handy. The key is to follow the guidelines when cleaning a Keurig 2.0 coffee machine. It will help and improve the life of the machine while you can enjoy your cup of Joe with no hassle whatsoever.
However, Keurig doesn’t recommend the use of softened water or distilled water. Bottled or spring water works best when brewing using a Keurig 2.0 coffee brewer.