
I love coffee, but nothing seems more of a chore than cleaning the coffee maker. A clean coffee maker is a necessity and just looking clean isn’t enough. I’ll grumble all I want, but I know it is important.
Health and hygiene are obvious reasons. Another reason is the taste of coffee. Coffee makers often have scale build up due to hard water and that can cause the coffee to taste terrible.
In this guide, I’ll discuss how to clean a coffee maker.
There are a huge number of different coffee makers and brands out there. It can be tough to keep track of the best cleaning methods. I’ll discuss various coffee makers by type and brand, and how best to clean them. So saddle up!
About Cleaning Your Coffee Maker
If you’ve used an automatic or semi-automatic coffee maker, you’ll have noticed that the machine can get overzealous about cleaning. It will let you know when it’s time to clean and sometimes get pretty insistent about it.
Manual coffee makers do not have such functions. So it is more important for the user to be more careful.
For some coffee makers, you may notice that just rinsing it with water makes it look sparkly clean. Don’t forget, It still needs a proper cleaning! It may not be necessary to get rinsing after every use, however, be regular with cleaning. Your coffee maker doesn’t have to look clean, it actually has to be clean.
People who make coffee at home only occasionally should be as careful. The troubles of mineral deposits and scaling (calcified deposits) will be less of a problem, they will eventually build up. Plus, there’s always the possibility of bacteria or yeast build up.
The good news is, cleaning the coffee maker is not especially difficult. In most cases, all you need are regular household supplies for thorough cleaning.
Coffee Makers And Cleaning
Electric coffee makers are very prone to being ignored in the cleaning process. A lot of the mechanism is not directly visible. That runs the risk of going out of sight, out of mind. Statistics suggest that nearly half of all home coffee makers have yeast or mold in the reservoir. You don’t want to be amongst those numbers.
Here’s a common enough misconception and mistake. Since coffee makers deal with near-boiling water, they aren’t at risk of bacteria and mold buildup.
That approach is wrong. You’ll need bacteria in contact with boiling water for several minutes before they’re effectively removed. Most coffee machines don’t reach that temperature. In fact, most brewing methods don’t hold a sustained temperature for killing all bacteria and mold.
The problem increases if there’s a need for descaling. These deposits can provide a safe haven for bacteria and mold even if the coffee machine becomes an inhospitable environment. That’s a big reason why you need to be thorough with the cleaning.
Clean Coffee Maker With Vinegar
Vinegar deserves a special mention. You’ll notice that a lot of coffee cleaning utilizes vinegar. While white vinegar is the popular path to a clean coffee maker with vinegar, others can play a role too.
Many of the methods listed here will make use of vinegar. Vinegar performs two essential cleaning operations simultaneously. It sanitizes the coffee maker and also descales or decalcifies mineral deposits.
Vinegar can clean mineral deposits inside a coffee maker quite thoroughly. Equally importantly, vinegar removes nearly 90% of mold and 99.9% of bacteria.
Here are the top reasons vinegar is a popular choice:
- Easily accessible
- Cost-efficient
- Non-toxic
- Removes mineral deposits
- Kills mold and bacteria
Another reason vinegar is preferred is that it is edible and non-toxic. In the event the user is not thorough with removing the cleaner, their health is not put at risk. The worst that can happen is you get a nasty cup of coffee.
Vinegar has an acidic content of 5%, which plays an important role in descaling and sanitizing. While this is true for most kinds of vinegar, white vinegar is preferred because it doesn’t have a strong odor. Additionally, it can be flushed out of the coffee maker easily.
You could also clean a coffee maker with apple cider vinegar or other options. However, these leave a strong odor and require a very thorough cleaning before the coffee maker can be used.
Vinegars with higher acidic content are also available on the market. It is extremely unlikely for a coffee maker to need that high a concentration. Regular vinegar will work just fine.
Coffee Maker Types And Brands
As I said, there are a number of coffee makers available. Given the varieties of coffee and our love for various drinks, it should be no surprise. The popular coffee maker types I’ll discuss in this guide are:
- Drip Coffee Maker
- Percolator
- French Press
- Espresso Machine
- Aeropress
- Pour Over Coffee Makers
- Cold Brew Coffee Makers
Cleaning processes related to specific brands are as important. The brands discussed here are:
- Keurig
- Ninja
- Bunn
- Cuisinart
Let’s dive in!
How To Clean A Drip Coffee Maker
Drip coffee makers are popular appliances found in most kitchens. They’re also very likely to have missed cleaning opportunities because the coffee maker interior is not visible to users.
This guide on how to clean a drip coffee maker can also be applied to cleaning espresso machines.
Most users take note when the coffee starts tasting funny. I suggest a more active schedule over waiting until the coffee’s taste gives you a warning. The timing depends on how much you use the coffee maker. Even if you use it sparingly, consider cleaning up every couple of months.
Many coffee maker brands encourage the use of their own cleaning products. We’ll discuss some of these later in this guide. For this section, however, the focus will be a generic cleaning method.
If you’ve been reading along, you guessed it. The active cleaning ingredient is white vinegar. As a simple household product, it may not seem as powerful as some branded cleaner. Don’t be prejudiced by branded cleaning products. As discussed earlier in this guide, vinegar is both powerful and efficient.
Here’s your complete guide on how to clean a drip coffee maker.
Preparation: Things You Will Need
- Enough white vinegar to fill half the water reservoir (or carafe)
- Sponge
- Dry kitchen towel
- Wet kitchen towel
- Dish brush
- Bottlebrush
- Hot soapy water (fragrance-free)
The reason I recommend fragrance-free soapy water (i.e. fragrance-free dish detergent) is because of ease in cleaning. Leaving fragrance on coffee maker parts isn’t the best way to clean them. The fragrance will interfere with the taste and aroma of the coffee and won’t give the best results of cleaning.
Step 1: Starting Off
Empty the carafe, filter, and water reservoir. Even if you’re sure they’re all empty already, do a check before you start cleaning. The water reservoir especially should be empty because it is where the cleaning solution will be placed. Existing water diluting the cleaning solution won’t be ideal.
Step 2: Preliminary Cleaning
Wipe the chamber with a wet kitchen towel to remove any dirt. There may be some random coffee grounds there or some grime. If you run into some particularly tough spots, it is worthwhile to use a brush to loosen the dirt.
Step 3: Mixing Water And Vinegar
Mix water and white vinegar in equal parts. This 1:1 ratio solution should go into the water reservoir of your coffee maker. If your coffee maker doesn’t have a removable water reservoir, it can be difficult pouring the mixture in the ratio we want. In such cases, either take your best guess or use the carafe.
Many machines have a carafe with a volume equal to the water reservoir. For example, a six-cup coffee maker will often have a six-cup volume for the reservoir and coffee maker.
Therefore, you can pour the vinegar and water into the carafe to get a better idea of the mixing ratio. Once you’re done, pour the mixture into the water reservoir.
In some cases, you may want to add two parts of vinegar for every part of water. This will create a stronger cleaning solution. There are very few instances where this is necessary. In most cases, staying with the 1:1 ratio will do the trick.
Step 4: Run A Half Brew Cycle
Switch on the coffee maker and let it heat up. Once the cleaning solution is warmed up, switch off the coffee maker. The cleaning mixture will do its job in loosening the mineral deposits and killing any mold and bacteria.
Let the coffee maker sit undisturbed for about an hour.
Step 5: Run A Full Brew Cycle
After the hour is up, switch on the coffee maker again. Once the water-vinegar mix is heated up, let it flow. Mineral deposits and stains will be flushed out as the brew cycle is completed. Any yeast, mold, and bacteria will likely have been killed by this point. Allow the machine to run and the cleaning solution will reach the carafe.
Once the cycle is complete, discard the contents of the carafe.
Step 6: Run Fresh Water Cycles
Refill the reservoir with water and run a full brew cycle. Once the cycle is complete, discard the contents of the carafe. Refill the machine with water and run another brew cycle with water.
The goal here is to get rid of any lingering vinegar or vinegar scent from the machine. One cycle can be good enough, but two cycles ensure that no odor or vinegar is left behind.
Step 7: Wash Coffee Maker Parts
If your machine has a portafilter, drop it in the soapy hot water solution. Thoroughly clean it to ensure that there are no stains or dirt.
Fill up the carafe with soapy hot water and scrub it clean. In case there are stains on the exterior, use the sponge and wet towel to wipe the carafe clean.
Use a damp towel to clean the surface of the coffee maker machine. The dry towel can be used to wipe after the damp towel for a better cleaning finish.
Suggested Product: Heinz All Natural Cleaning Vinegar
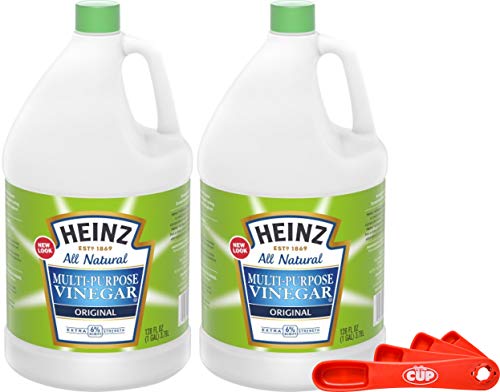
Heinz All Natural Cleaning Vinegar is geared towards use as a cleaning product. This vinegar has a slightly higher acidic content at 6% compared to the usual 5% acidic content.
It is more potent but can be easily diluted when required. The manufacturer says the vinegar is made with sun-ripened grain and crystal clear water.
How To Clean A Stainless Steel Coffee Percolator
Cleaning coffee stains inside a percolator can be difficult, to say the least. On a cursory look, one would imagine that cleaning a stainless steel percolator will be easy. Think of stubborn coffee stains, grime, and clogged filter (if you’re using one). Now you can imagine the effort a thorough cleaning needs.
Preparation: Things You Need
- White vinegar
- Baking soda
- Brush
- Water
Step 1: The Baking Soda Cycle
Fill the percolator with water and add three tablespoons of baking soda. Turn on the percolator and let it run through a cycle.
Step 2: Letting It Sit
The water and baking soda mixture will soon heat up. As the mixture gets hot enough, turn off the percolator and let it sit.
For the purpose of this guide, my recommendation is to let it sit till the water cools down. However, if you’d like to skip the use of vinegar, let the mixture sit overnight. In this case, complete Step 3 and then move to rinsing with fresh water in Step 5.
Step 3: Cleaning It
Once the mixture cools down, take a brush and thoroughly clean the insides of the percolator. After you’re done scrubbing, discard the mixture. Now rinse the percolator with clean water to ensure all traces of baking soda are removed.
Step 4: Some Vinegar Action
Fill the percolator with a mix of water and white vinegar. Ideally, both these components should be added in equal parts. A 1:1 ratio works best.
Switch on the percolator and let it complete a cycle. Let the mixture cool for a few minutes, then discard the cleaning solution.
Step 5: Run A Water Cycle
Fill the percolator with clean and fresh water and run a cycle to remove any lingering odor and residue. This should remove any possible traces of baking soda and vinegar. If you still sense some smell, run another cycle with fresh water.
Suggested Product: Arm And Hammer Baking Soda
The old and trusted brand seems to be a natural choice. This particular product comes in a resealable, water-resistant bag.
How To Clean A French Press
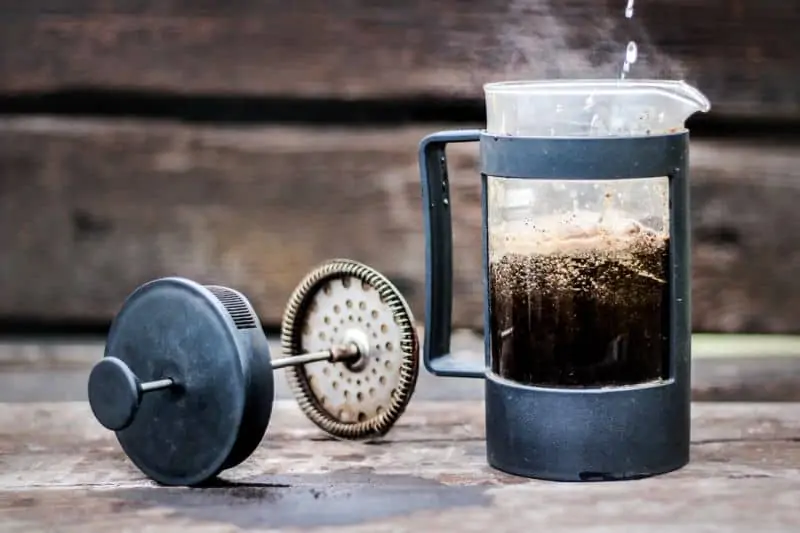
Cleaning the French Press requires some careful effort. The container is relatively easy but the multiple layers of filter require more effort in cleaning.
There are other precautions that shouldn’t be ignored. Scooping out used grounds with a spoon or slapping the french press like a ketchup bottle are a big no. That’s just a shortcut to damaging and scratching your french press. Here’s a better and more efficient way to do the cleaning.
Things You Need
- Baking soda
- Dish soap
- Mesh strainer
- Long brush
- Soft cloth
- White vinegar (optional, use only if necessary)
Step 1: Emptying The French Press
Remove the plunger from the French press. Add some warm water and swirl it a bit to remove coffee grinds or similar particles.
Step 2: Strain
Hold a mesh strainer over the kitchen sink and empty the French press into it. The water will fall but the coffee grounds will stay in the strainer. You can drop the coffee grounds into the garbage. Composting is a good idea and you can also consider dropping the grounds into your garden.
Step 3: The Simple Clean
We don’t need to be very thorough with daily cleaning. Put some warm water in the carafe and add a few drops of dish soap. Now place the plunger and push it up and down a few times.
The soap solution will appear all bubbly, which is your cue to stop. You may use a brush to clean away oil and stains that may have crept into the coffee maker.
Step 4: Rinse
Rinse the French press with water to remove all traces of dish soap. Don’t forget to rinse the filter too, or your next cup of coffee will end up tasting of soap!
Step 5: The Thorough Clean
A thorough clean doesn’t have to be a part of your regular French press cleaning strategy. However, you should use it at least every month or a few weeks, depending on the frequency of use.
For this step, disassemble the plunger so the filters can be individually cleaned. Mix some baking soda with water to create a cleaning solution. You only need enough water to make baking soda pasty. That will make it easier to apply and manage.
Step 6: Cleaning The Filter
Use a brush to rub the baking soda solution on each filter of the French press. If there are spots of persistent residue on the carafe, put some baking soda paste there as well. Scrub all parts with a brush.
Step 7: Some Vinegar Action
It is unlikely that you will need vinegar after all this thorough cleaning. However, if you still notice some tough stains or clogged parts of the filter, it’s time to use vinegar. Mix equal parts of water and vinegar and use that solution to scrub the carafe and the filters.
You may also choose to place this solution in the carafe and then put the plunger and filters in it. Let them stay for half an hour.
Step 8: Rinse It Well
Drain the cleaning solution. Now, thoroughly rinse the carafe and filters to get rid of all traces of vinegar and baking soda. Let all parts dry.
Once all parts are dry, reassemble the plunger and place it in the carafe. Your French press is ready to brew more delicious coffee.
How To Clean Espresso Machine
Essentially, the basics of how to clean espresso machine are quite similar to the drip coffee machine explained above. Here’s what you need to do:
Preparation: Things You Need
- White vinegar
- Dish soap
- Dry kitchen towel
- Wet kitchen towel
- Brush
- Sponge
Step 1: Empty The Espresso Machine
The first step to cleaning your espresso machine is ensuring that the water reservoir, filter, and carafe are all empty. There should not be any used coffee grounds in the portafilter or residual water in the reservoir.
Step 2: Water And Vinegar
Create a mix using equal parts of water and white vinegar. Mix this solution and add it to the water reservoir. Vinegar will work as a descaler as well as an anti-bacterial and anti-mold agent.
Step 3: Brew It
Switch on the espresso machine and let it work as it would normally brew coffee. The vinegar-water mix will descale your machine and will take out any mold or bacteria in the machine.
Step 4: Run Fresh Water Cycles
Run a couple of fresh water cycles to remove any remaining vinegar. This will also remove any lingering odors.
Step 5: Cleaning
Clean removable parts of the machine with a warm dish soap mixed in water. If these parts are dishwasher safe, you may place them in the dishwasher as well.
Wipe the machine clean with a sponge and wet towel.
Suggested Alternative: Urnex Coffee Maker and Espresso Machine Cleaner
As you see, a lot of this guide focuses on the use of easily available household cleaners like vinegar. While vinegar is convenient, you can also give these machine cleaners a shot. Cleaners like the Urnex Coffee Maker and Espresso Machine Cleaner do an excellent job of removing grime, coffee oils, and descaling the coffee maker.
How To Clean An Aeropress
Aeropress presents a simple way to make great coffee. However, given the number of parts involved, cleaning can take some effort. It isn’t difficult or impossible, so here’s the path we can take to cleaning the Aeropress.
You can place Aeropress on the top-shelf of the dishwasher. The steps listed below apply if you need to do manual cleaning to manage some tough spots.
Preparation: Things You Will Need
- Dish Soap
- Water
- Brush
Step 1: Empty The Aeropress
Start by unscrewing the cap and pressing on the aeropress. This will push out the used coffee grounds and filter. Rinse it with water to remove any stubborn coffee grinds.
Step 2: The Cleaning Mix
A brush and dish soap can be used to clean the insides of the Aeropress. You can create a mix of water and dish soap and soak Aeropress in this mix. Use a brush to clean out any stubborn stains, grime, or coffee grounds.
Step 3: Rinse With Water
Thoroughly rinse Aeropress with water to ensure the dish soap is completely removed. Special attention needs to be given to the plunger and rubber gasket.
Suggested Product: Seventh Generation Dish Liquid Soap
One reason I like the Seventh Generation Dish Liquid Soap is its lack of fragrance. There are no added fragrances, dyes, or phosphates in this product. This means it won’t interfere with the aroma and taste of the coffee. It is also pretty good at getting rid of grease and tough residue, hypoallergenic, and suitable for sensitive skin.
How To Clean Pour Over Coffee Filter

This section deals with permanent pour over coffee filters. This includes your gold or stainless steel mesh filters used in pour over coffee makers. Given the similarity, the process can be applied to filters used in cold brew coffee, coffee baskets for drip coffee makers, and other metal filters.
Filters tend to collect oily residue and their holes start clogging. They carry the risks of mineral deposits from water as well. If you’re wondering how to clean a pour over coffee maker like Chemex, here’s a quick overview. The carafe can be cleaned with a dish soap and brush. The general process is very similar to cleaning the French press carafe mentioned above.
Preparation: Things You Will Need
- White Vinegar
- Brush
- Water
Step 1: Mix Vinegar And Water
Mix equal parts of water and white vinegar. This creates a cleaning solution. Note, the process mentioned here is meant for deep cleaning the filter. For regular use, it is okay to rinse the filter with water.
Step 2: Heat The Cleaning Mix
Heat the cleaning mix until it starts to boil. Add the filter to this boiling mixture and let it stay for a few minutes. Remove the heat and let the filter stay soaked in the mix overnight.
Step 3: Rinse
After the filter is done soaking, check for any clogged points in the filter. In case you see any, just scrub them away with the brush. Drain the water-vinegar mix and wash the filter thoroughly with fresh water.
How To Clean A Keurig Coffee Maker
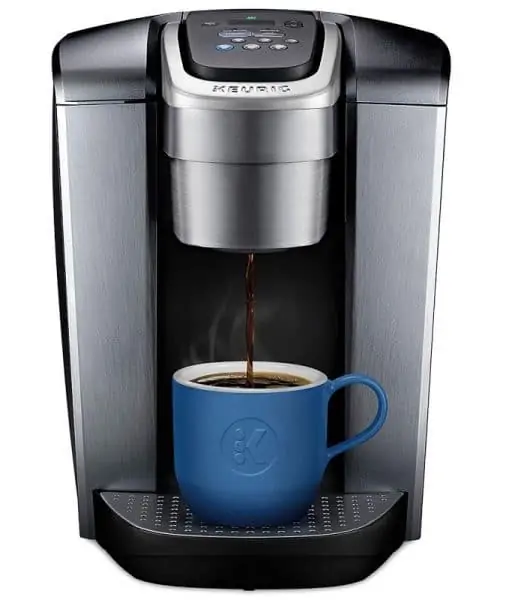
The Keurig single-serve coffee system’s popularity is tough to beat. Keurig thrives on convenience and that philosophy shows up in their coffee maker cleaning approach as well. The company recommends cleaning the coffee maker every 3-6 months depending on the water quality in your area.
Keurig recommends its own cleaning solution for the company’s brewers. However, they have no problem if you choose to use white vinegar instead. It would be useful to add slightly more vinegar than water while creating the mix.
Several parts of this guide have information on cleaning with vinegar, I’ll focus on the cleaning solution for this part. This step-by-step guide on how to clean a Keurig coffee maker is relevant to machines with a removable water reservoir. If you have a Keurig Mini, skip to the end of this section for instructions on cleaning a K-Mini.
Preparation: Things You’ll Need
- Keurig Descaling Solution
- Clean, Dry Cloth
- Large coffee mug
- Dish soap
Step 1: Empty The Coffee Maker
Remove the water reservoir from the coffee maker and empty it. Also, check that there are no pods in the machine. This initial check ensures that the cleaning process will go smoothly and there are no surprises to ruin the cleaning progress.
Step 2: Add The Descaling Solution
Empty one bottle of Keurig Descaling Solution into the water reservoir. Fill the empty bottle of the descaling solution with water and add it to the water reservoir as well.
Attach the water reservoir to the machine and switch it on.
Step 3: Run The Brew Cycle
Start a new brew cycle without adding a K-cup. Draw the cleaning solution into the coffee mug and empty it into the sink. Repeat the process several times until the water reservoir is empty.
Step 4: Let The Machine Idle
As the water reservoir empties, the “add water” light on the Keurig machine will come up. At this point, let the machine stand undisturbed for 30 minutes while it is powered on. Don’t run a brew cycle and don’t switch off the machine.
Step 5: Rinse And Clean
Rinse the reservoir thoroughly to remove all traces of the cleaning solution. Fill it with fresh water and reattach to the machine.
At this point, you may also want to take the cleaning cloth and wipe the surface of the machine. Don’t forget to clean around the coffee pod holder!
Step 6: Run A Cycle With Water
Run water cycles until the reservoir is empty. Discard mug contents after every brewing cycle. This will remove any traces of the cleaning solution that may have lingered in the machine.
At this point, your machine is all clean and ready to use. That said, you may still choose to follow the next step for a more thorough cleaning.
Step 7: Get Washing
Remove parts of the machine that can be removed for cleaning. Often, but not necessarily, these include the water reservoir and lid, mug stand, and K-cup holder. Clean these parts with dish soap so there are no residues that need cleaning.
Quick Overview On Cleaning The Keurig K-Mini
Since the K-mini is small and doesn’t have a removable reservoir, we will make small changes to the cleaning approach.
- When using the Keurig Descaling Solution, pour one-third of the bottle into the machine. The remaining capacity should be filled with water.
- Switch on the brewer and let one cup of the cleaning solution flow. Discard the contents of the cup into a sink.
- As the brew indicator light turns on again for the next cup, power off the brewer. Let it sit for about 30 minutes.
- Start brewing again. You may brew several cups until the reservoir is empty.
- Fill the reservoir with fresh water and run cleaning cycles with water to remove all traces of the descaling solution in the machine.
If you choose to use white vinegar over Keurig’s descaling solution, start by adding vinegar to the empty water reservoir. There is no need to add water to dilute it. After the first cup of the cleaning solution is brewed, switch off the machine and let it stand undisturbed for 3-4 hours.
Once the wait time is over, complete the brew cycles until the reservoir is empty. After this, run a few cycles with clean water to completely remove the cleaning solution.
How To Clean A Ninja Coffee Maker

Cleaning a Ninja coffee maker is relatively easy. The brand does not insist on specific cleaning products. This makes it easy to clean the coffee maker with available household times. Vinegar, of course, is top of the list!
There is always the option of using a descaling product. For this guide on how to clean a Ninja coffee maker, I’m going to choose a descaling solution. If you prefer vinegar for cleaning, you can check out the “How To Clean A Drip Coffee Maker” section above. The steps are the same.
Well, the overall procedure is quite similar when you are using a descaling product. This section is designed to be illustrative of this use. I’m using the Ninja Coffee Bar as a reference for the coffee maker. The instructions provided here will also work with other coffee makers from the brand.
Suggested Descaler: Bar Keepers Friend Coffee Maker Cleaner
BKF (Bar Keepers Friend) has a pretty good reputation for its cleaning products. The coffee maker cleaner follows the same general principle. This descaling liquid will remove any mineral deposits from the coffee machine. It also removes stains and cleans the carafe as well.
BKF cleaner is available as a solution. The company recommends diluting the cleaner with water when using it. They recommend a ratio of 1:8, which means for every part of the descaling solution, you’ll add 8 parts of water.
Preparation: Things You’ll Need
- Descaler or Vinegar
- Water
- Wet and dry kitchen towels
- Sponge
- Dish soap
Step 1: Setting Things Up
Switch off the coffee maker and make sure it is not connected to the power supply. Check the reservoir and filter to see if they are empty. There shouldn’t be any water in the reservoir or coffee grounds in the machine. The carafe should be empty as well.
Step 2: The Cleaning Solution
Pour the BKF cleaner and water into the water reservoir. Do follow the suggested ratio, and add eight parts of water for every part of the cleaner. You don’t have to be exact but try to match the ratio as best as you can.
Since the reservoir of the Ninja Coffee Bar is transparent and has markings, creating the mixture is easy.
Note: If you are using the BKF Descaler or similar products, keep the coffee maker (and descaler) away from stone surfaces. The descaler’s job is to get rid of mineral deposits. That means it is no friend to marble or granite surfaces.
Step 3: The Clean Cycle
One of the coolest things about the Ninja Coffee Bar is that the machine automatically checks for cleaning requirements. If it senses calcium or mineral deposits, it sets off a cleaning indicator light. This usually happens every 3-4 months.
In any case, don’t forget to clean the coffee maker regularly even if the indicator doesn’t show up!
At this point in the descaling process, simply press the “Clean” button on the Ninja Coffee Bar. This activates the clean cycle and the machine will automatically run complete checks and complete the cleaning process. Place the carafe in its position before you press the clean button.
Step 4: Fresh Water Cycles
Discard the contents in your carafe. Now, add fresh water to the water reservoir and run 3-4 cleaning cycles. This will ensure that all of the cleaning solution is flushed out from the coffee maker.
Step 5: Cleaning Other Parts
You can use a mild soapy solution and a brush to clean the carafe and the water reservoir. Rinse thoroughly afterward to remove all traces of soap from the carafe and reservoir.
How To Clean Bunn Coffee Maker
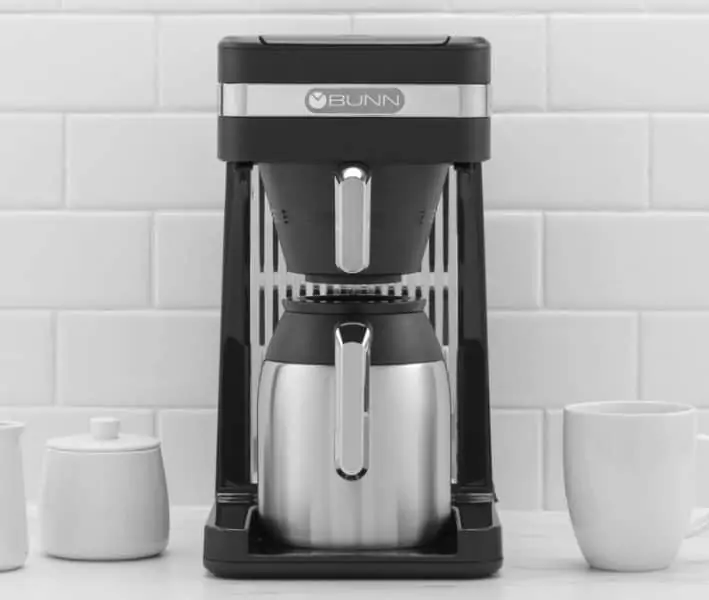
The line of coffee makers from Bunn can be impressively fast. They can also be a pain in the a*s to clean. There are two major components to cleaning these coffee makers.
First off is the deep clean, which is similar to the usual fare of vinegar or a descaler. The second is the cleaning of the sprayhead tube. We’ll talk about both of them in some detail.
This section is about cleaning the Bunn Speed Brew coffee maker. It is also applicable to the older Bunn Velocity Brew line. The cleaning agent of choice here is the old faithful white vinegar. Here’s a step by step guide on how to clean Bunn coffee maker.
Preparation: Things You’ll Need
- Vinegar
- Water
- Toothpick
- Kitchen towels
- Dish soap
- Deliming tool, this is provided in the package with the coffee maker
Step 1: Starting Off
Take a quart (32oz) of white vinegar. Place a carafe in its spot on the coffee maker. Now, access the water reservoir lid and pour vinegar into it.
Step 2: Let It Stay
As you pour vinegar into the water reservoir, some liquid will flow through the brew funnel and end up in the carafe. At this point, close the lid and switch off and unplug your Bunn Speed Brew coffee maker.
Let the coffee machine with vinegar in it sit undisturbed for 2 hours.
Step 3: Cleaning The Sprayhead
Removing the brew funnel will make the sprayhead accessible. Unscrew the sprayhead and check to see if any of its holes are clogged by deposits. If there are deposits, use a toothpick to clear them.
Wash the sprayhead with dish soap and a cloth. Rinse it with water.
Step 4: Removing The Vinegar
Remove the lid and pour a carafe full of fresh water into the brewer. Don’t close the lid until you have placed the carafe in its spot under the brew funnel. There is no need to place the brew funnel or sprayhead yet, just ensure that the carafe is in the right position.
Close the lid and water will flush out vinegar from the machine. Collect it in the carafe. Discard the contents of the carafe once the flow stops.
This process should be repeated 2-3 times to ensure that vinegar completely clears out from the coffee maker.
Step 5: Back To Brewing
At this point, you can reattach the sprayhead. Plug in the coffee maker and switch it on. It will take about 15 minutes for the water to reach brewing temperature. It’s ready to brew coffee!
Many coffee makers require completing an active brewing cycle with water to remove the cleaning agents. There is no need to do that when cleaning the Bunn Speed Brew. This is because we removed the vinegar in the previous step. However, if you feel like it, you can run a brew cycle to be sure.
Cleaning The Sprayhead Tube
As mentioned earlier, Bunn Speed Brew will have you do some extra work by having you clean its sprayhead tube. This should be done every three months on average. It’s better to get this out of the way when you’re deep cleaning the coffee maker.
- Unplug the coffee maker and let it cool for 2 hours.
- Remove the brew funnel and unscrew the sprayhead.
- Removing the sprayhead will expose the sprayhead tube. Insert the deliming tool into the tube. Remember to keep about 2 inches of the deliming tool outside the spray tube.
- Gently move and slide the tool a few times. This will loosen or remove any deposits that may have formed.
- Remove the deliming tool and reinsert the brew funnel in place.
- Take a carafe full of fresh water and pour it into the coffee maker. Don’t close the lid.
- Place the carafe in its place on the warmer plate and close the lid. Water will flow into the carafe and clean out the loosened deposits in the sprayhead tube.
- Clean the sprayhead as described in the previous section.
- Put the sprayhead back into its place. Place the brew funnel in place.
- Plug in the coffee maker. It is now ready for action.
How To Clean A Cuisinart Coffee Maker
Cuisinart makes some of the most popular coffee makers on the market. Apart from making good coffee, most of these machines work pretty well with a simple cleaning process. It is okay to use white vinegar or a descaler with Cuisinart coffee machines.
Though there are several models available, the cleaning process is largely similar. In case your Cuisinart coffee maker doesn’t have a dedicated clean button, you can follow the “How To Clean A Drip Coffee Maker” section described earlier in this article.
Nearly all coffee makers from this company, including the budget models, have an auto-clean function. This approach is remarkably useful and very user-friendly. Here’s how you can get it all done.
Preparation: Things You Will Need
- Vinegar
- Dish soap or mild detergent
- Kitchen towels or a clean cloth
Step 1: Adding Vinegar
Mix white vinegar and water in a 1:2 ratio. That means, for every part vinegar, add two parts of water. You may also choose to go with a 1:1 ratio.
Step 2: Start The Cleaning Cycle
Your Cuisinart machine likely has a button to kick off the cleaning cycle. For many models, this button is accompanied by an LED light to let users know it’s time to clean it. Once you’ve added the vinegar and water mix, place the carafe in its position.
Hit the “clean” button and the coffee maker will get into action.
Step 3: Completing The Clean Process
After the machine is done with the clean cycle, it will shut itself down. Discard the contents of the carafe. The cleaning process is done!
Step 4: Washing And Cleaning
Remove the filter basket and wipe the area with a damp cloth. You may also want to wipe down the coffee maker to clean its body and exteriors.
The filter basket, carafe, and lid are top-rack dishwasher safe. However, to be on the safe side, check the information booklet available with your machine. If still in doubt, you can wash these parts in warm, soapy water. Rinse thoroughly after you’re done.
Once you’re done, place these components back in the machine.
Step 5: Run A Water Cycle
Fill the water reservoir on your coffee maker with clean, fresh water. Run a brew cycle to clean it and remove any lingering vinegar or its smell. You may have to repeat this a couple of times to ensure vinegar and its odor is removed.
Keeping Your Coffee Maker Clean
Your coffee maker, like any other appliance that handles edibles, should be cleaned regularly. Simply wiping the surface is not enough. Sometimes, you will have to do thorough and deep cleans. This comprehensive guide on how to clean a coffee maker provides detailed instructions for cleaning your coffee maker of choice.
The frequency of cleaning will depend on the machine, how often you use the machine and the water supply in your area. If you get hard water, it may be necessary to clean the coffee maker more often. Alternatively, you can use water filters and similar methods to reduce the mineral deposits left behind.